
Podcast: Play in new window | Download
Subscribe: Apple Podcasts | Spotify | Pandora | RSS | More
Updated on December 12, 2019
Synopsis
By adding an infographic to your blog, and giving your readers an easy way to share it, is a sure way to help build your network. We can make the infographic easy to share by adding a “share box” immediately below it. This gives other bloggers a fast and simple way to share your infographic. Here are the three simple steps that I follow in order to create and add a “share box” to my own infographics.

What You Will Learn
1. You’ll learn an easy and fast way to add a “share box” to your infographic.
2. You’ll learn why a “share box” is an excellent and painless way to get your readers to share your infographic.
3. You’ll learn why an infographic with a share box below it will help you look more like a professional blogger.
Introduction
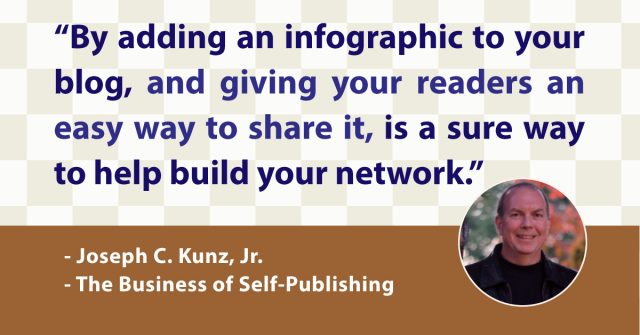
Infographics are a visually compelling way to grab a reader’s attention. They can very quickly help you communicate information in an easy-to-digest format. And, by adding an infographic to your blog, and giving your readers an easy way to share it, is a sure way to help build your network.
We can make the infographic easy to share by adding a “share box” immediately below it. This gives other bloggers a fast and simple way to share your infographic. This share box contains an “html embed code” that other bloggers can copy and paste into their own blog. This will make your infographic appear on their blog, and it also gives your blog a backlink.
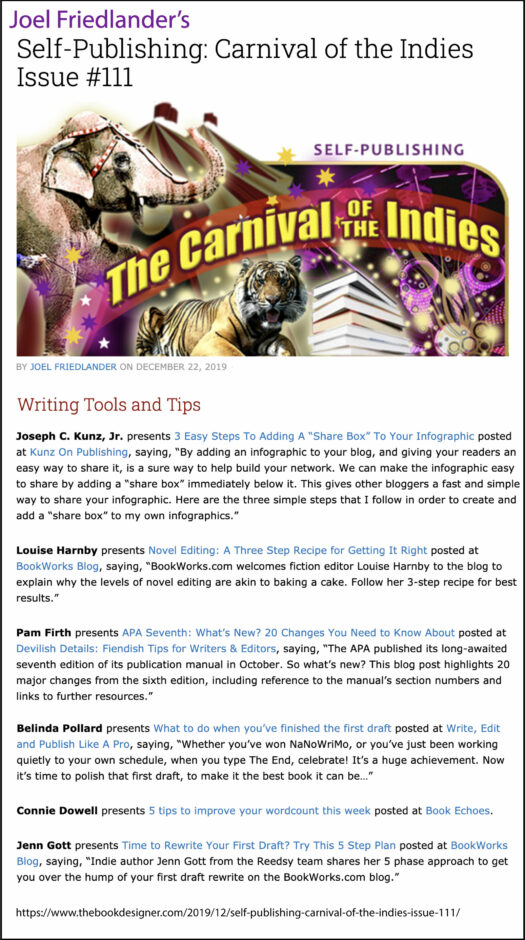
Here are the three simple steps that I follow in order to create and add a “share box” to my own infographics:
STEP # 1. Create Your Infographic
I typically create my blog post first. Then I design an infographic that can explain the information in my blog post in a simple, fun, and easy-to-understand format. I try to keep it visually appealing by using colors, fonts, and images that will catch the reader’s eyes. I use Adobe Illustrator CC, and then convert the finished Illustrator file into a jpg. Then I simply upload that image to my WordPress media folder.
STEP # 2. Place Infographic Into Your Blog Post
I then find a place within my post to place the image, such as between major sections or between paragraphs. Then I click the “Add Media” button and then choose the appropriate image from my blog’s media folder. You must do this from within the “text editing” page, NOT the “visual editing” page.
STEP # 3. Add A “Share This Image Box” Under The Infographic
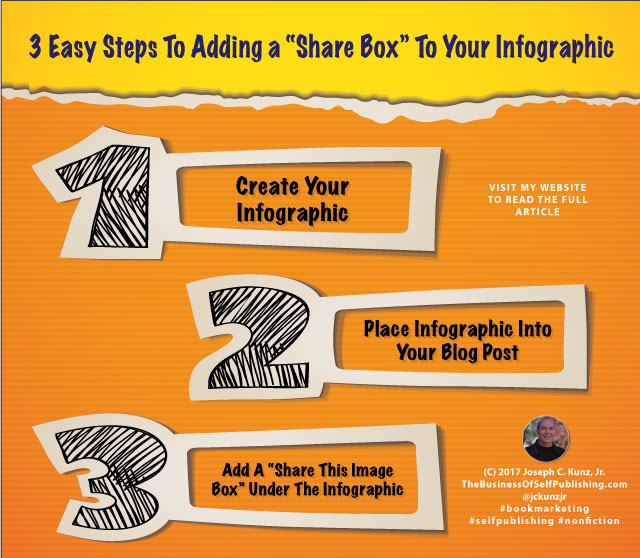
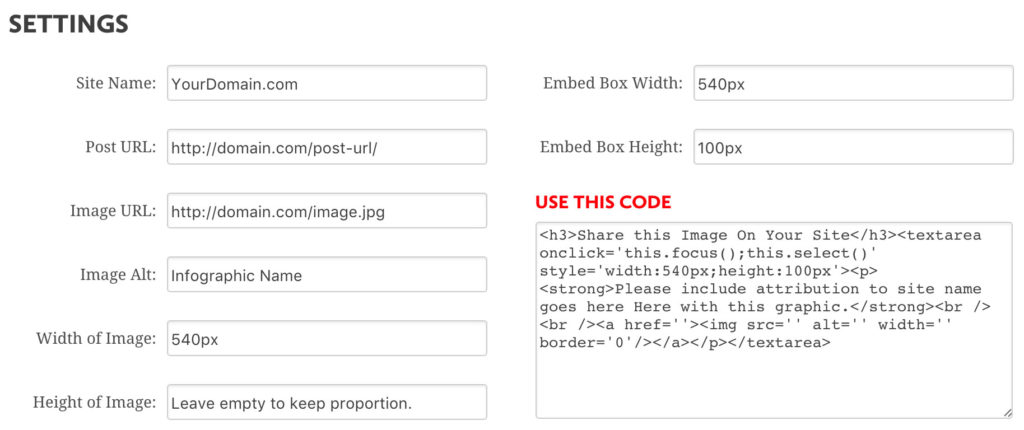
Start by using an “embed code generator” that will help you create your share box. The best one I’ve been able to find so far is by Siege Media. I didn’t have much luck finding a WordPress plugin that I liked, or that would do what I wanted it to do for me. But this one by Siege Media fits my needs perfectly. All of the fill-in boxes are self-explanatory.
Blank embed code generator form. Form provided by Siege Media.
Filled-in embed code generator form. Form provided by Siege Media.
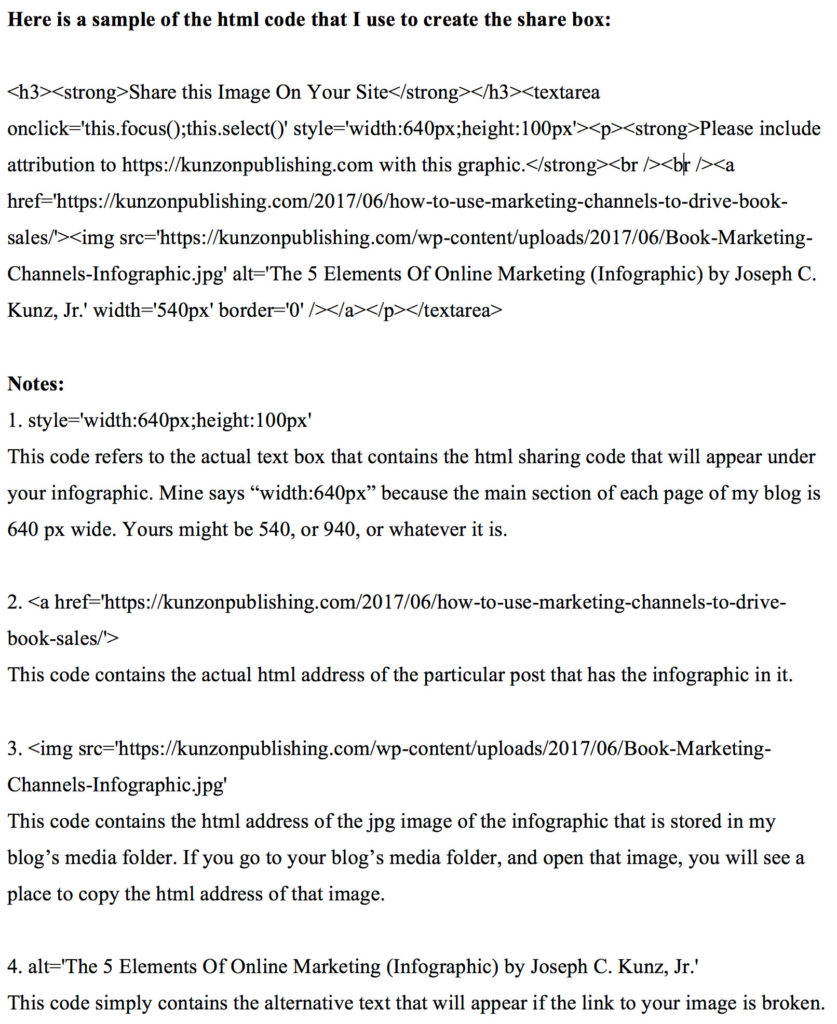
Here is a sample of the html code that i use to create the share box.
THE VIEW OF THE HTML ON MY BLOG:
Here is what the final HTML code looks like on my blog post’s text editing page:
1. The first section in the image below is the code for the actual jpg image of the infographic that will appear in my blog post.
2. This second section in the image below is the code for the share box that will appear just below my infographic.
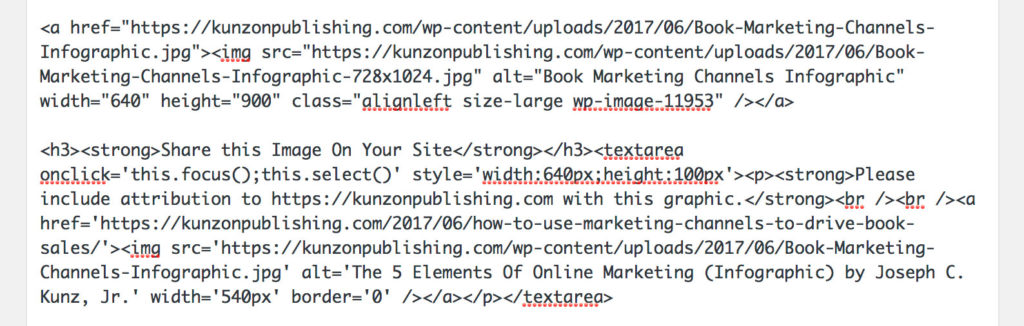
Screenshot of the html code that I have placed into my WordPress blog.
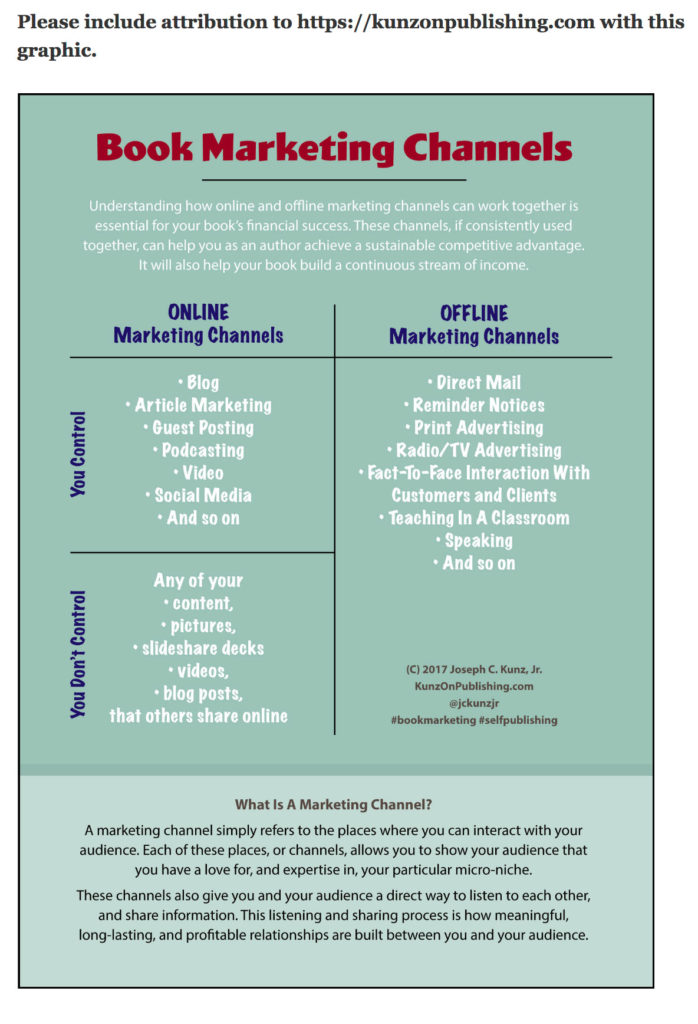
THE VIEW FROM MY BLOG:
Here is what the finished infographic and share box looks like on my blog:

Example of an infographic with a share box attached below it.
Now a reader of your blog can simply copy the HTML code inside that share box, and paste (embed) it within their own blog, and share it with their readers.
THE VIEW FROM ANOTHER’S BLOG:
Here is what the infographic will look like on someone’s blog when embedded on their blog:
This is how my infographic appears when embedded on another person’s blog.
Conclusion
Following these three steps really do make it easy for you to give your readers a simple and fast way to share your infographic. And you don’t need to know any HTML. It just involves some copying and pasting. And the finished result makes you look like a professional that is serious about blogging and networking.
Questions For Us To Think About And Discuss
1. Do you prefer to create your blog post first, or the infographic first?
2. After you create an infographic, and add it to your post, do you also post the infographic by itself as a separate post?